Configuring the Payop Plugin in WooCommerce
Configuring the Payop Plugin in WooCommerce:
1.Ensure the Payop plugin is activated on your WordPress website. If it’s not already active, follow these steps:
– Open your WordPress admin panel.
– Navigate to the “Plugins” section.
– Look for the Payop plugin and click “Activate” if it’s listed but inactive.
2.Access WooCommerce Settings. In your WordPress admin panel, go to the WooCommerce settings to configure the Payop payment gateway:
– Click on “WooCommerce” in the left-hand menu.
– Click on the “Settings” button.
3.Navigate to the “Payments” tab. Within the WooCommerce settings, select the “Payments” tab. This is where you can manage all payment-related configurations for your online store.
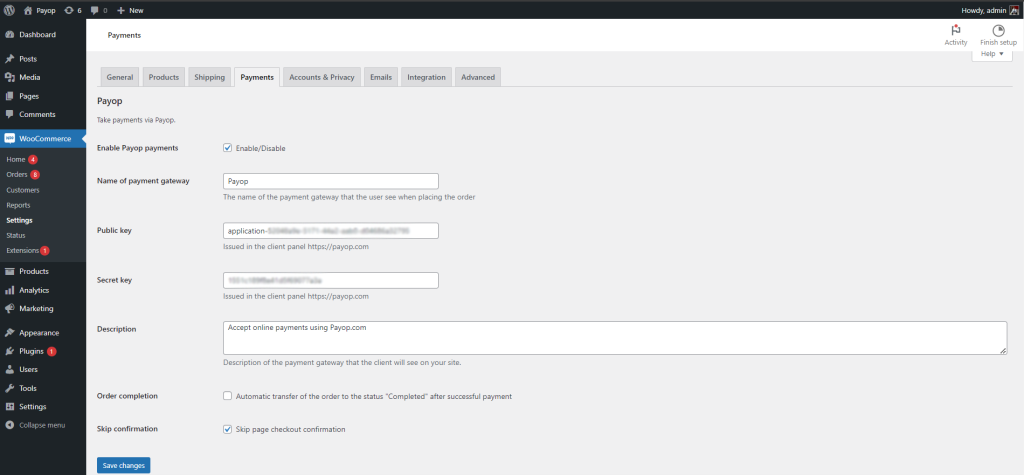
4.Locate the Payop Payment Option and Configure:
– Scroll down to find the option related to Payop among the available payment methods. You should see “Payop” or the name you specified in the “Name of payment gateway” field when setting up the plugin.
– Click on the Payop option to access the plugin’s settings. This is where you will configure the details required for Payop payments to function correctly.
– Fill in the required Public key and Secret key fields.
– Name of payment gateway. In this field, you can specify the name customers will see at the checkout when choosing the Payop option to pay for an order.
– Description. In this field, you can briefly describe the payment gateway, which will be visible to customers on your website. It helps customers understand that they can use Payop for online payments.
– Automatic transfer of the order to the status “Completed” after successful payment. Enabling this option will automatically change the order status to “Completed” once a successful payment is made via Payop.
– Skip page checkout confirmation. If enabled, this option allows you to skip the confirmation page during the checkout process, streamlining the payment process for customers.
– Payment form language. This setting enables you to select the language for the payment form displayed on your website. Choose the language that best suits your customers.
– Save Your Settings. After entering the necessary information, make sure to save your settings within the Payop plugin. You will typically find a “Save” or “Update” button at the bottom or top of the plugin settings page. Click on it to save your configurations.
By following these steps, you have successfully configured the Payop plugin within WooCommerce on your WordPress website. This will allow your online store to accept online payments using Payop as a payment gateway.
Please check the video instruction by following the link.